Reinstalling a computer can be a tedious task. Many small business partners know this well, especially after installing the operating system, reinstalling software, and restoring personal settings. Some people opt for Ghost systems, but these come with their own set of issues. Online packaged systems may not guarantee a clean installation without malware or unwanted software. Ghost backups are not always up-to-date, which means they might miss critical updates or files. In reality, the built-in backup and restore features of the system are more than sufficient—offering real-time protection, easy recovery, and straightforward operation.

The Pros and Cons of Using Ghost
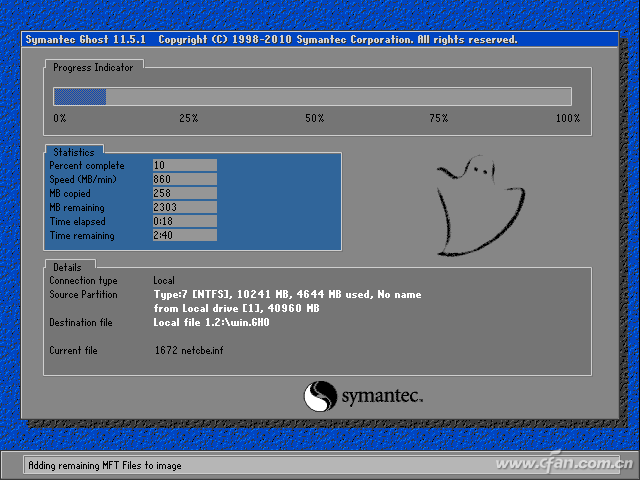
Ghost is a convenient tool for backing up your system, but it's not a perfect solution. When you back up using Ghost, it functions similarly to compression software by copying data and creating GHO image files. Upon restoration, all the fragments are automatically reassembled. However, this method can lead to increased fragmentation on the recovered system, which is one of the main reasons why many users avoid Ghost over time.
How to Perform Real-Time Backup in Windows 10
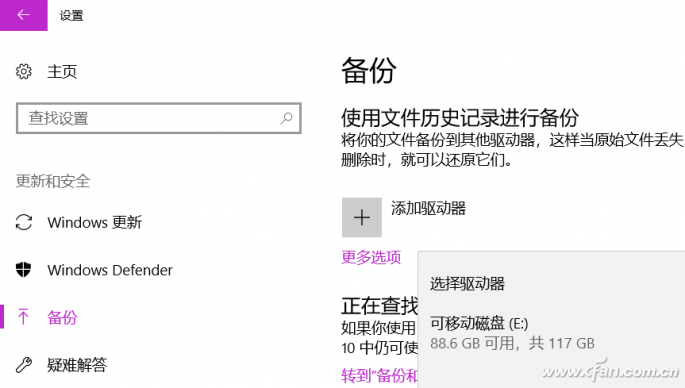
To begin, prepare a USB drive or an external hard disk with at least 32GB of space. I personally use one that takes up less than 15GB, so it’s safer to go with something larger than 32GB. Unlike Ghost, which does a full system backup, Windows 10 backs up only essential files and settings, making it more efficient and less resource-heavy.
Open the Start menu and type “Backup.†Click on “Add Drive†on the right side to choose your external storage device.
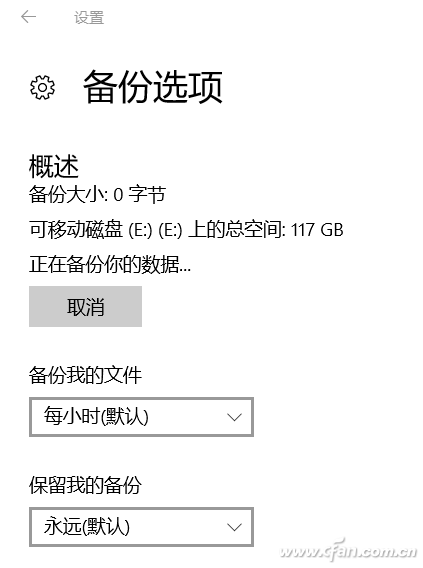
Once selected, Windows 10 will start the backup process. You can adjust the backup schedule and retention period in the settings. Additionally, your personalized system settings are backed up automatically without any manual selection.
The default backup folder is already set up, but if you want to add more custom locations, you can do so here.
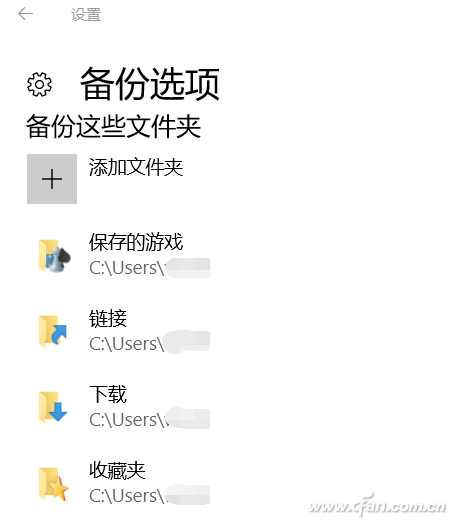
If there are certain folders you don’t want to back up, such as temporary files, you can scroll down and add them to the “Exclude these folders†section.

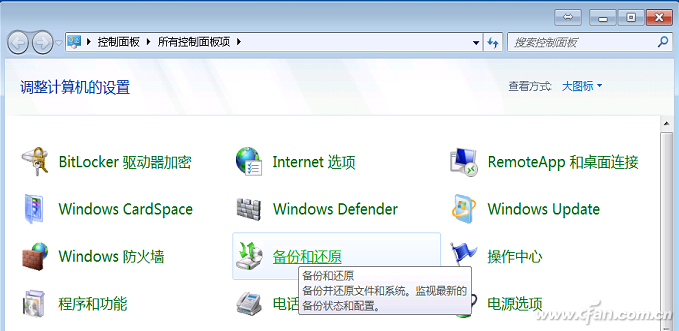
How to Backup in Windows 7
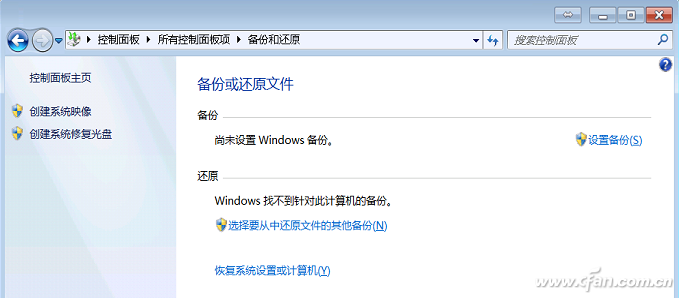
Some users still rely on Windows 7. If you're one of them, here's how to back up your system. After reinstalling the OS, you can quickly restore your saved files and settings. Open the Control Panel and look for “Backup and Restore.â€
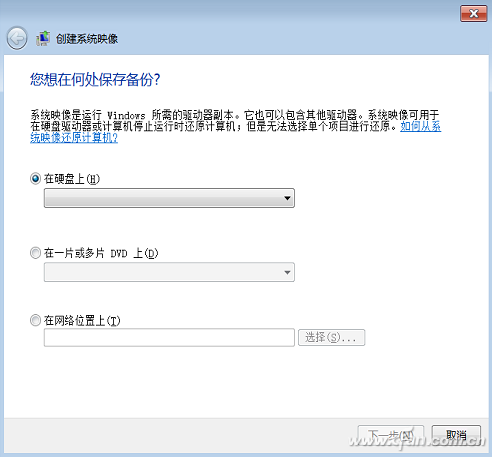
Click “Create System Image†on the left side.
In the new window, select “Back up to a hard disk†and choose your USB drive or external hard disk. Click Next to proceed.
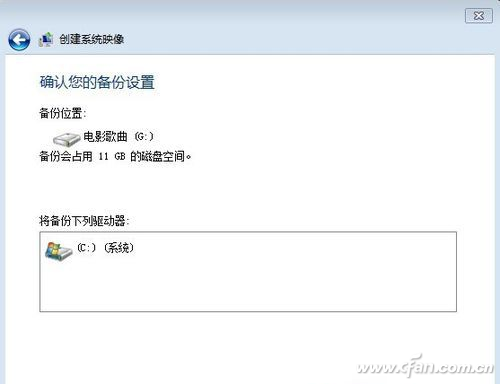
On the confirmation screen, double-check the backup location and drive. By default, it’s usually the system disk. Click “Start Backup†and wait for the process to finish. Once done, you’ll be asked if you want to create a system repair disc. I recommend skipping this step unless necessary.
In the future, whether you're restoring from an existing system or a newly installed one, go to “Backup and Restore†in the Control Panel and click “Select another backup from which you want to restore files.â€