Git branches, why and how to use branches
In the first two articles in this series, we started using Git to learn how to clone projects, modify, add, and delete content. In this third article, I will introduce the Git branch and why and how to use it.

Use a tree to depict the Git repository. The tree in the figure has many branches, either long or short, or extending from the trunk or extending from other branches. Here we use the trunk as the master branch of the repository, where master refers to the "master branch", which is the central branch or first branch of the Git repository. For the sake of simplicity, we assume that master is the trunk, and the other branches are divided from this branch.
Why use a branch in a Git repository
The main reasons for using branches are:
If you want to add new features to your project, it is likely to affect the current working code. For the active users of this project, this is a very bad thing. Instead of adding features to the master branch that other people are using, it is better to change the code in other branches of the warehouse. The following is a specific way of working.
More importantly, Git is designed for collaboration. If everyone is working on the master branch of your code repository, it will cause a lot of confusion. The knowledge and experience of a programming language or project varies from person to person; some people may write code that has bugs or defects, and may also write code that you feel is inappropriate for the project. Using branches allows you to verify the contributions of others and choose the appropriate ones to add to your project. (This assumes that you are the sole owner of the code base and wish to have full control over the code added to the project. In a real project, the code base has multiple owners with the combined code rights)
Create branch
Let's review the previous article in this series and see what happens in our demo directory. If you have not done this, follow the instructions in the article to clone the code from GitHub and enter the Demo directory. Run the following command:
Pwd
Git branch
Ls -la
The pwd command (which is the abbreviation of the current working directory) returns the current directory you are in (to confirm that you are in the Demo directory), git branch lists all the branches of the project on your host, and ls -la lists the current directory. All files. Your terminal output is similar to:
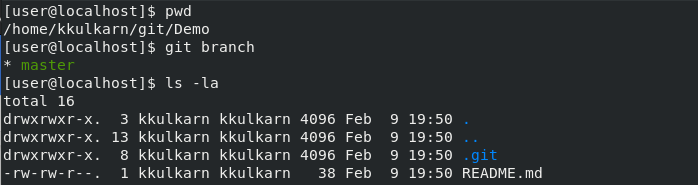
In the master branch, there is only one file, README.md. (Git will friendly ignore other directories and files.)
Next, run the following command:
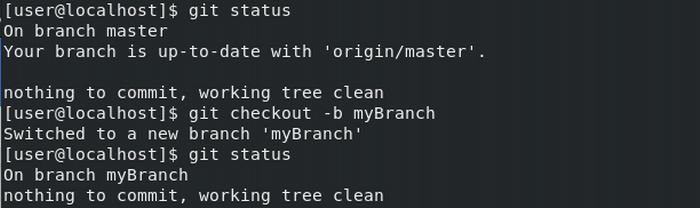
Git status
Git checkout -bmyBranch
Git status
The first command git status tells you that you are currently in the branch master (as seen in the terminal) and it is in sync with origin/master, which means that all files in the local copy of the master branch also appear in GitHub . There are no differences between the two copies, and all submissions are the same.
The next command, -b in git checkout -b myBranch tells Git to create a new branch named myBranch, and the checkout command then switches us to the newly created branch. Run the third command git status to make sure you are already under the branch you just created.
As you can see, git status tells you that you are currently in the myBranch branch and no changes need to be submitted. This is because we have neither added new documents nor modified existing documents.
If you want to see the branch visually, you can run the gitk command. If you get the error bash: gitk: command not found..., please install the gitk package first (find your operating system corresponding installation documentation to get the installation method).
(LCTT Annotation: Need to run gitk on a terminal with an X server, otherwise it will report an error)
The following figure shows what we did in the Demo project: The last time you submitted (the corresponding message) was Delete file.txt, which was submitted three times before. The current submission is marked with yellow dots. The previous submissions are marked with blue dots, and the three squares between the yellow dot and Delete file.txt show the position of each branch (or the position of the last submission in each branch). . Since myBranch has just been created, the commit status is consistent with the master branch and its corresponding remote master branch labeled remotes/origin/master. (Thanks very much to Peter Savage from Red Hat for letting me know about gitk.)

Let's create a new file under the myBranch branch and observe the terminal output. Run the following command:
Echo"Creating a newFile on myBranch" > newFile
Cat newFile
Git status
The echo in the first command creates a file called newFile, then cat newFile prints out the contents of the file, and finally git status tells you the current state of our myBranch branch. In the following terminal output, Git tells the myBranch branch that a file named newFile is currently in the untracked state. This indicates that we did not have Git track the changes that occurred on the file newFile.

The next step is to add the file, commit the changes, and push the newFile file to the myBranch branch (review previous article in this series for more details).
Git add newFile
Git commit -m"Adding newFile to myBranch"
Git push origin myBranch
In the above command, the branch parameter used by the push command is myBranch instead of master. Git adds newFile and pushes the changes to the Demo repository under your GitHub account, telling you to create a new branch on GitHub that is identical to your local copy branch, myBranch. The terminal output screenshot gives the details of the run command and the command output.

When you visit GitHub, you can find two alternative branches in the drop-down list of branch selection.
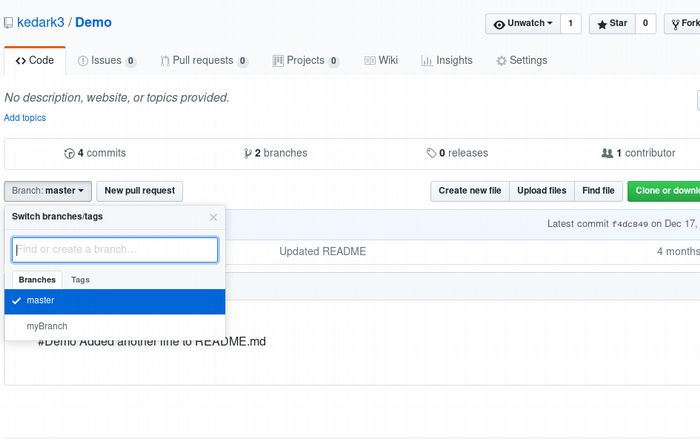
Click myBranch to switch to the myBranch branch and you can see the new file added to this branch.

As of now, we have two branches: one is the master branch with only one README.md file; the other is the myBranch branch with two files.
You already know how to create a branch. Next we create a branch. Enter the following command:
Git checkout master
Git checkout -bmyBranch2
Touch newFile2
Git add newFile2
Git commit -m"Adding newFile2 to myBranch2"
Git push origin myBranch2
I don't give the terminal output anymore and you need to try it yourself, but you can verify your results in the GitHub repository.
Delete branch
Since we added two branches, delete one of them (myBranch), including two steps:
Deleting a Local Branch You cannot delete a branch that is in operation, so you switch to the master branch (or whatever branch you wish to keep). The commands and terminal output are as follows:

Git branch can list the available branches, use checkout to switch to the master branch, and then use git branch -D myBranch to delete the branch. Run git branch again to check if there are only two branches left (instead of three).
Deleting a branch on GitHub Use the following command to delete the remote branch of myBranch:
Git push origin :myBranch
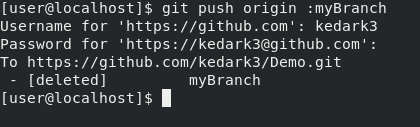
The colon (:) in front of the branch name in the push command above tells GitHub to remove the branch. Another way to write is:
Git push -dorigin myBranch
Where -d (also available with --delete) is also used to tell GitHub to delete your branch.
We have studied the use of the Git branch. In the next article in this series, we will describe how to perform fetch and rebase operations. This is something that must be learned for projects where multiple people contribute at the same time.
5050 Single Color Led Strip ,Single Color Led Strip,Single Color Led Strip Lights,Single Colour Led Strip
NINGBO SENTU ART AND CRAFT CO.,LTD. , https://www.lightworld-sentu.com